Server Setup Guide
This guide will help you through the simple steps of setting up a basic Tribes: Vengeance server. For this you will need the Tribes Vengeance Beta Server.exe application.
Only the basics will be covered here. For more information on how to add mods or tweak the settings, visit our Server configuration guide (coming soon) or our how to add mods guide (coming soon).
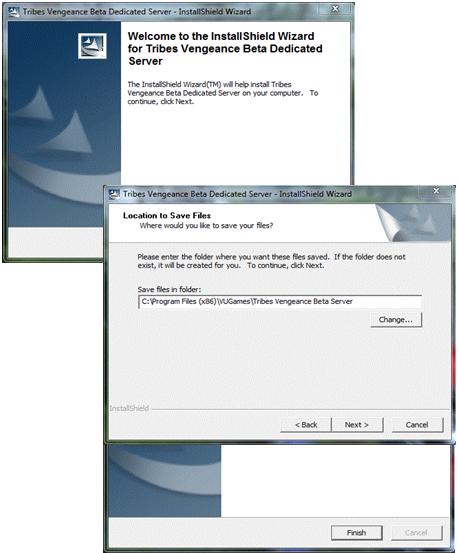
1. Server Installation
The first step is to install the sever files, which you have hopefully downloaded, using the link above.
This step requires you to simply follow the given steps, when running the executable file: Click on next, Choose the installation path and finish the installation.
2. Open Ports
The second step is to open the necessary ports. This will allow your server to communicate with the users.
Tribes Vengeance requires two ports to be opened, in both TCP and UDP : 7777 and 7778
Since there are many different routers, there are many different ways to forward a port. Luckily there is a website, which has summed up all possible routers and gives instructions for all possible applications: Portforward.com
Simply choose your router and follow the instructions given.
3. Disable Gamespy
Thirly, it is needed to reroute Gamespy communication.
As you might be aware of, Gamespy dropped the remaining support for Tribes Vengeance and thus closed down the master server. This means that the server list in game is no longer displaying servers. Another issue is that game servers are no longer able to reach the master server, and that will (simply said) result in the Tribes: Vengeance server not working as it should.
Luckily, however, there are workarounds. You have two options.
The first option is the most easy one. Download the Engine.DLL file from THIS PAGE and replace the original Engine.DLL file in your …/Program/Bin. That is all you need to do, if you choose to do it this way.
The second way is a bit more challenging than the first. Instead of telling the game where to go, you are going to reroute all connections made to specified addressess to another address. You do this by editing your hosts file. You can do this, by following these steps:
- Open your notepad as administrator
- Go to File -> Open
- Browse to
C:\Windows\System32\Drivers\etc\hosts - Change the viewing file type to “All Files (*.*)”.

- Open the “ hosts” file
- Add the following three lines:
 # BEGIN TRIBES VENGEANCE CUSTOM

 65.112.87.186 tribesv.ms15.gamespy.com

 65.112.87.186 tribesv.master.gamespy.com

 65.112.87.186 tribesv.available.gamespy.com

 63.239.170.53 motd.gamespy.com

 65.112.87.188 gamestats.gamespy.com

 # END TRIBES VENGEANCE CUSTOM
4. Basic Settings
Your server has now been made accessible to the tribes world. However, before you can start running your server, there are a few things left to do. You need to set up the basic settings such as a server name, administrator logins and such.
Server Settings
To set the basic server information, please follow these steps:
- Navigate to your Program/Bin folder, located in the place you chose to install the server to
- Find the file called “ Beta_Dedicated_Server.ini”
- Open it, with a text editing program, like notepad
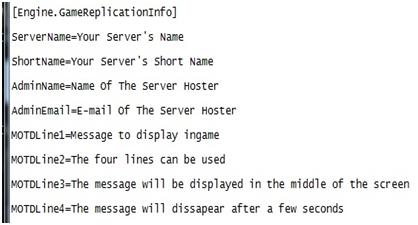
- Search the following, by using CTRL + F: [Engine.GameReplicationInfo]
-
Change the following items to your liking:
- Search the following, by using CTRL + F: [Engine.AccessControl]
-
Change the following to your liking:

Admin Settings
In order to be able to administrate your server, you must first create a login, which you can later use.
- Navigate to your …/Program/Bin folder
- Find the file called “ TribesAdmin.ini”
- Open it, with a text editing program, like notepad
-
Change the following line
AdminUsers=(AdminName="Admin",Password="Admin",Privileges="",Groups=("Admin"),ManagedGroups=())to
AdminUsers=(AdminName="YourLogin",Password="YourPassword",Privileges="",Groups=("Admin"),ManagedGroups=())
For example:

In this example “ Cobra” is the login and “ Tribesftw” is the password.
5. Liftoff
You are now ready to launch your server! To do so, follow these steps:
- Navigate to your Program/Bin folder, located in the place you chose to install the server to
- Find the file called
Beta_Dedicated_Server.exe - Run the executable
The IP of your server will be the same as you external IP. To know what your external IP is, you can go to a website like: http://whatismyipaddress.com/